
TL;DR

Get everyday helpers delivered free with Prime
- Fast, free delivery on millions of items
- Prime Video, Amazon Music and more included
- Member-only deals all year
Widening a doorway for wheelchair access involves measuring carefully, choosing the right method, and complying with building codes. You can do it yourself or hire professionals for complex work, with recent innovations making the process easier.
Always measure carefully before starting to ensure your new doorway will be wide enough for comfort.
Widening a doorway usually requires removing the existing frame, then enlarging and reinforcing the opening.
Follow local building codes and ADA standards—permitting is often necessary for structural work.
Sliding or pocket doors can maximize space and improve accessibility, especially in tight areas.
For load-bearing walls, professional help ensures safe, compliant modifications that last.
How to Measure Your Doorway for a Perfect Fit
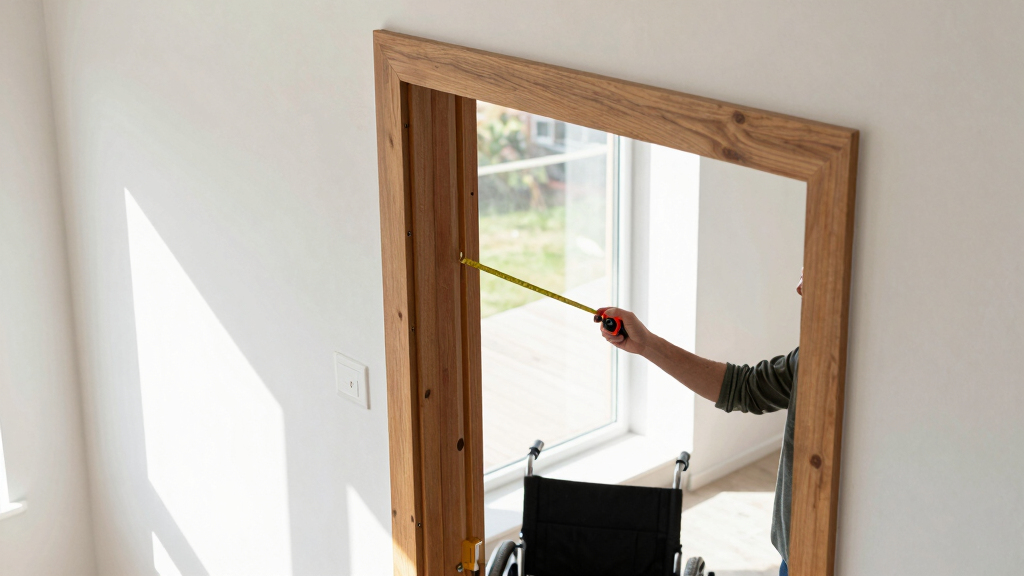
Before you start cutting into walls, you need to know exactly how wide your doorway should be. Standard doorways are 28-32 inches wide. For wheelchair access, aim for at least 32 inches, with 36 inches being ideal for comfort.
Take a tape measure and record the current width. Then, measure the space you’ll need for the wheelchair to pass freely—consider the width of the chair plus a little extra for maneuvering. For example, if your wheelchair is 24 inches wide, adding 4-6 inches gives a comfy clearance of about 30-30.5 inches. Use a level to check the height and ensure the opening will be even after modification. Imagine a friend rolling in with their wheelchair—your goal is a smooth, unobstructed path, with no surprises.
As an affiliate, we earn on qualifying purchases.
Choosing the Best Method to Widen Your Doorway
There are a few ways to enlarge a doorway, and your choice depends on your skills, budget, and the wall type. The most common approach is removing and replacing the door frame, which involves enlarging the existing opening. This method is straightforward but may require careful measurement to avoid structural issues.
Other options include structural modifications—like removing part of the wall or adjusting framing—and installing wider or sliding doors. For example, a homeowner might replace a standard swinging door with a pocket door that slides into the wall, creating more space and ease of use. These options can significantly impact the room’s layout and aesthetics, so consider how each tradeoff aligns with your needs. For instance, pocket doors save space but may be more costly and complex to install. Think about your home’s layout, your budget, and your comfort level—sometimes a simple upgrade can make a big difference.
door widening tools for home renovation
As an affiliate, we earn on qualifying purchases.
As an affiliate, we earn on qualifying purchases.
Step-by-Step: How to Enlarge Your Doorway in 5 Easy Steps
- Measure accurately to determine the new width needed.
- Mark the new opening on the wall using a level and pencil.
- Remove the existing door and frame carefully.
- Cut the wall along your marked lines with a reciprocating saw, ensuring you keep within the new measurements.
- Reframe the opening with new lumber, install a wider door or sliding system, then finish with drywall, paint, and hardware.
For example, a homeowner might go from a 28-inch opening to a 36-inch one by following these steps. To do this effectively, understanding the importance of precise measurements and proper framing is crucial, as errors can lead to structural weaknesses or uneven surfaces. Remember, if you’re dealing with load-bearing walls, consulting a professional ensures safety and compliance. The tradeoff here is balancing DIY effort with potential risks—knowing your limits helps avoid costly mistakes later.
As an affiliate, we earn on qualifying purchases.
Understanding Building Codes and When to Call a Pro
Widening a doorway must meet local building codes and ADA standards. The ADA recommends a minimum of 32 inches for doorways and 36 inches for passageways. These standards ensure safety and accessibility, but they also influence your design choices—wider openings often require more structural work and possibly more permits.
If your walls are load-bearing or if you’re unsure about structural changes, it’s best to hire a licensed contractor. For example, in a historic home, removing part of a wall might require additional permits or reinforcements to ensure the integrity of the structure. Remember, permits are often mandatory, and neglecting them can cause issues later on, including fines or safety hazards. The tradeoff is between the convenience and potential cost savings of DIY versus the assurance and safety of professional expertise.
As an affiliate, we earn on qualifying purchases.
Tools, Materials, and Safety Tips for a Smooth Widening Job
Gather your tools: measuring tape, level, saw, drill, hammer, and possibly a reciprocating saw. For materials, you’ll need new framing lumber, drywall, paint, and hardware. Safety is key—wear goggles, gloves, and a dust mask to protect yourself from debris and dust. Proper safety gear prevents injuries and ensures the job proceeds smoothly.
For example, using a cordless drill and a level can make framing quicker and more precise, reducing the risk of errors that could compromise stability. Before starting, clear the area and turn off power if working near electrical wiring to prevent accidents. A calm, organized workspace helps avoid accidents and speeds up the process. The tradeoff here is balancing efficiency with safety—taking the time to prepare properly avoids costly setbacks or injuries.
Latest Trends and Innovations Making Widening Easier
Recent developments include sliding and pocket doors, which save space and improve accessibility. Automated doors that open with a sensor or remote are also gaining popularity, especially for those with limited mobility. These innovations can drastically change how you approach home modifications, adding convenience and modern aesthetic appeal.
Prefabricated widening kits now offer modular solutions that snap into place, reducing the need for extensive carpentry and minimizing mess. Eco-friendly materials, like low-impact framing and insulation, are also on the rise, aligning accessibility with sustainability. For example, a homeowner installed a sliding barn door that widened their hallway entrance, making wheelchair passage effortless and adding a rustic charm. The tradeoff with these innovations is often initial cost versus long-term convenience and accessibility improvements.
Quick Facts You Need to Know Before Starting
- The ADA recommends a minimum of 32 inches for doorways, but 36 inches is ideal for comfortable wheelchair access.
- Widening a doorway usually involves removing the frame and enlarging the opening, which can impact structural integrity if not done carefully. Understanding these implications helps you plan accordingly.
- Always check local building codes and obtain permits if necessary, as failure to do so can result in delays or legal issues.
- Professional help is recommended for load-bearing walls or extensive modifications to ensure safety and code compliance, avoiding costly mistakes.
- Use low-threshold or flush transitions to prevent tripping hazards and ensure smooth passage, which is critical for safety and ease of use.
Cost, Permits, and How to Stay Within Budget
Widening a doorway can cost anywhere from a few hundred to several thousand dollars. Minor DIY projects lean toward the lower end, but structural work, especially in load-bearing walls, pushes costs higher. Planning your budget carefully and understanding the scope of work helps avoid unexpected expenses. Always get multiple quotes if hiring contractors, and ask about hidden costs such as permits or reinforcements.
Permits are usually required—checking with your local building department beforehand can prevent delays or legal issues. Planning ahead and understanding your home’s structure can save money and prevent surprises. For example, removing a wall in a small apartment might be a few hundred dollars, but in a large house, it could reach into the thousands. Considering these factors helps you make informed decisions and stay within your financial limits.
Handling Thresholds and Transitions for a Seamless Entry
Thresholds should be as low as possible—ideally less than 1/2 inch—to prevent tripping and facilitate smooth wheelchair movement. Use flush or beveled transitions to create a seamless surface from one room to another, which is crucial for safety and ease of mobility. Silicone or specialized sealant can help seal gaps and keep the space airtight, preventing drafts and moisture intrusion.
For example, replacing a raised threshold with a low-profile aluminum strip makes rolling a wheelchair easier and safer. Think of it like a gentle ramp—your goal is effortless passage, not a bump in the road. The tradeoff here is balancing the aesthetic and functional benefits—low thresholds improve accessibility but may require more precise installation to maintain a clean look.
Frequently Asked Questions
How much does it typically cost to widen a doorway for wheelchair access?
Costs can range from a few hundred dollars for simple DIY adjustments to several thousand for extensive structural work with professional help. It depends on wall type, size, and local labor rates.Can I widen a doorway myself, or should I hire a contractor?
Minor adjustments like removing a door frame and enlarging the opening can be DIY if you have carpentry skills. For load-bearing walls or complex structural changes, hiring a professional is safer and ensures code compliance.What permits are needed for widening a doorway?
Most jurisdictions require permits for structural modifications, especially when load-bearing walls are involved. Check with your local building department before starting work to avoid fines or safety issues.What types of doors are best for wheelchair accessibility?
Sliding doors, pocket doors, and low-threshold or flush-entry doors are ideal because they require less space to open and provide smoother passage for wheelchairs.How do I prevent tripping hazards at the doorway threshold?
Use low-profile, beveled, or flush thresholds, and seal any gaps with appropriate materials. Aim for a transition less than 1/2 inch high to keep movement smooth and safe.Conclusion
Turning a narrow doorway into an accessible, open passage isn’t just about cutting walls—it’s about creating freedom of movement. With the right tools, measurements, and a bit of planning, you can make your home more welcoming for everyone. Think of each widened doorway as a step toward greater independence and comfort—an investment that pays off every time someone rolls through with ease.Columbus Day / Indigenous Peoples' Day Picks
long weekend sales
As an affiliate, we earn on qualifying purchases.