TL;DR

Get everyday helpers delivered free with Prime
- Fast, free delivery on millions of items
- Prime Video, Amazon Music and more included
- Member-only deals all year
Designing an accessible kitchen means creating space for easy movement, installing user-friendly appliances, and using smart lighting and contrast. Proper planning can boost safety and independence for all users.
Imagine preparing a meal in a kitchen where everything is within easy reach, surfaces are comfortable to work on, and technology responds to your voice. That’s the power of a well-designed accessible kitchen—no more bending, stretching, or crawling for that one spice jar. It’s about transforming a space so everyone can use it safely and comfortably, regardless of age or ability.
If you’re considering a renovation or building from scratch, knowing how to plan for accessibility can save you headaches later. In this guide, you’ll learn the key features, latest innovations, and practical steps to craft a kitchen that truly works for everyone.
Design wide pathways (at least 36-48 inches) to allow easy movement and turning.
Use varied counter heights and pull-out storage to make items accessible without stretching or bending.
Choose appliances with front controls, side-opening doors, and touchless features to enhance usability.
Incorporate smart technology like voice control and remote monitoring for added independence.
Plan your layout step-by-step, considering both current needs and future adjustments.
How to Create a Spacious, Clear Path for Easy Movement
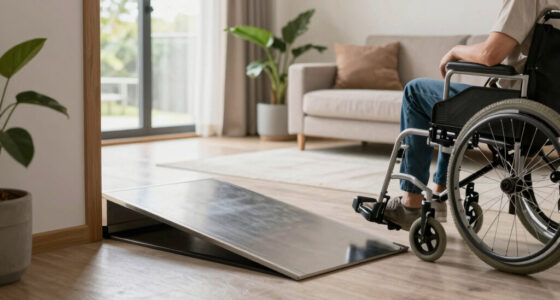
The first step in planning an accessible kitchen is ensuring there’s enough room to move freely. According to ADA standards, a minimum of 36 inches of clear width is necessary for most pathways. For wheelchair users, 48 inches of space allows turning comfortably. Why does this matter? Because narrow pathways can cause frustration, accidents, or even injuries, especially if someone needs to maneuver quickly or carry items. Providing ample space not only enhances safety but also promotes independence, allowing users to navigate without assistance. However, the tradeoff is that larger spaces may reduce storage or counter space unless carefully planned, so balancing openness with functionality is key. Think of it as designing a dance floor—nothing should block your steps or cause you to trip, but the layout should still serve your cooking needs.
For example, a family kitchen with a wheelchair user might have a wide, open layout with a central island. This space allows someone to navigate, turn, and reach appliances without feeling cramped. Using this approach makes everyday tasks smoother and safer, ultimately encouraging more confidence and autonomy in the kitchen.
accessible kitchen appliances with front controls
As an affiliate, we earn on qualifying purchases.
As an affiliate, we earn on qualifying purchases.
Smart Ways to Make Counters and Storage Reachable for Everyone
Accessibility isn’t just about space; it’s about what’s within reach and how easily it can be accessed. Kitchen countertops should have varied heights—some at 34 inches, others adjustable or lower at 30 inches. This variety ensures that users of different heights or those in wheelchairs can comfortably work at different stations. Why does this matter? Because uniform counter heights can limit usability, forcing users to stretch or strain, which may lead to fatigue or injury over time. Incorporating adjustable or lower counters broadens the range of users who can perform tasks independently, fostering confidence and reducing reliance on others. Pull-out shelves, lazy Susans, and open cabinetry are practical solutions—they minimize bending, reaching, and climbing, which are common barriers. But there’s a tradeoff: more accessible storage options may require additional space or investment, so prioritizing frequently used items can optimize both accessibility and space efficiency. Using open shelves and pull-out drawers means less hassle and more independence, empowering users to access what they need with minimal effort.
adjustable height kitchen countertops
As an affiliate, we earn on qualifying purchases.
As an affiliate, we earn on qualifying purchases.
Compare Accessible Appliances and Fixtures Side-by-Side
| Feature | Standard Kitchen | Accessible Kitchen |
|---|---|---|
| Oven type | Top-opening, often high | Side-opening, at waist level |
| Sink controls | Knobs or handles, sometimes hard to turn | Lever handles, touchless options |
| Counter height | Generally uniform, 36 inches | Varying heights, adjustable or lower at 30 inches |
| Storage access | Standard cabinets, pull-down or reach-in | Pull-out shelves, open storage, Lazy Susans |
This side-by-side view highlights how accessible features prioritize ease of use and safety, especially for those with limited mobility. These modifications are essential because they directly impact the user’s ability to perform daily tasks independently, reducing frustration and potential hazards. For example, side-opening ovens at waist level eliminate the need to reach over hot surfaces or climb, decreasing burn risks and physical strain. Lever handles on sinks are easier to operate for individuals with limited grip strength, promoting autonomy. Varying counter heights adapt to different user needs, preventing awkward postures or fatigue. Open storage solutions like pull-out shelves and Lazy Susans allow for easy access without bending or stretching, which is particularly important for users with joint issues or balance concerns. In essence, these features are about designing a kitchen that responds intuitively to diverse needs, making safety and independence the core priorities.
smart voice-controlled kitchen devices
As an affiliate, we earn on qualifying purchases.
As an affiliate, we earn on qualifying purchases.
Step-by-Step Guide to Planning Your Accessible Kitchen
- Assess your needs: Consider mobility, vision, and strength challenges. Understanding specific limitations helps tailor the design to maximize independence and safety. For example, someone with limited vision might need high-contrast surfaces and better lighting, while a person with limited strength benefits from lever handles and easy-to-open fixtures. Recognizing these needs upfront prevents costly modifications later and ensures that the kitchen truly supports all users.
- Map out your space: Measure existing or planned areas, noting doorways, windows, and fixed features. Accurate measurements are vital because they influence the placement of appliances, storage, and pathways. Poor planning here can lead to cramped areas or inaccessible zones, which diminish safety and usability. Think of this step as creating a blueprint that balances available space with functional zones, ensuring that every element is within reach and that pathways remain clear for movement.
- Design for flow: Ensure pathways are wide enough and furniture is arranged to avoid obstacles. A logical flow reduces unnecessary movement, making cooking and cleaning more efficient. For instance, placing the refrigerator near the prep area minimizes walking distance, while keeping clutter out of walkways prevents tripping hazards. Good flow enhances independence by allowing users to complete tasks smoothly without needing assistance or risking injury.
- Select fixtures and appliances: Choose front-control, side-opening options, and adjustable surfaces. These features are critical because they directly influence ease of use, safety, and comfort. For example, front-control stoves allow for easier access without reaching over hot burners, and adjustable-height counters accommodate users of different statures or those in wheelchairs. Investing in these fixtures may have higher upfront costs but significantly improves daily usability and reduces accidents, making them worthwhile for long-term independence.
- Incorporate smart tech: Think voice-activated lights, appliances, or remote monitoring systems. These innovations can dramatically enhance independence by allowing users to control their environment without physical effort. For example, voice-controlled lighting and appliances enable someone with limited mobility or strength to operate the kitchen efficiently. While smart tech may require initial setup and investment, it offers convenience and safety benefits that often outweigh the costs, especially for users with significant mobility challenges.
- Test and revise: Walk through your plan, ask others for feedback, and adjust for comfort and safety. This iterative process ensures that the kitchen truly meets your needs. Small adjustments, like repositioning a switch or adding a grab bar, can make a significant difference in daily comfort and safety. Testing also helps identify overlooked hazards or inefficiencies, enabling you to refine the layout before finalizing construction or renovation.
widened pathway kitchen safety products
As an affiliate, we earn on qualifying purchases.
As an affiliate, we earn on qualifying purchases.
What Are the Latest Trends Making Kitchens More Inclusive?
Recent innovations are reshaping accessible kitchen design. Voice-activated appliances let you start the coffee or turn on the oven without reaching, reducing physical strain and increasing independence. Modular cabinetry adapts to your changing needs, offering flexible storage solutions that can be reconfigured as your requirements evolve. Eco-friendly, slip-resistant flooring enhances safety by minimizing falls, especially in wet or high-traffic areas. These trends are significant because they reflect a shift towards more adaptable, user-centered kitchens that prioritize safety and usability. For example, a homeowner might install a voice-controlled faucet paired with a pull-down sprayer, making dishwashing easier for someone with limited grip. These technological and design innovations not only improve safety but also promote a sense of autonomy, encouraging users to engage more actively in everyday tasks. Embracing these trends ensures that kitchens remain functional and inclusive as users’ needs change over time.
What You Need to Know About Costs and Budgeting
Adding accessibility features can vary widely in cost. Basic retrofits like lever handles or lower countertops might be under $2,000, especially if done incrementally. More comprehensive remodels, incorporating smart technology, custom fixtures, and extensive layout changes, can reach $15,000 or more. These costs reflect the complexity and scope of modifications but are investments in safety, independence, and long-term usability. Planning ahead helps you prioritize features that most impact daily life—such as accessible appliances or safety enhancements—and phase in additional upgrades over time. This phased approach allows you to spread out expenses, making the process more manageable financially. Additionally, exploring grants, subsidies, or tax incentives for accessible renovations can help offset costs and make comprehensive upgrades more feasible. Ultimately, understanding the tradeoffs between cost and benefit ensures you create a kitchen that balances affordability with functionality, supporting independence for years to come.
Frequently Asked Questions
What are the minimum measurements for an accessible kitchen?
The ADA recommends at least 36 inches of clear width for pathways and 30-36 inches for work surfaces. For wheelchair users, 48 inches of turning space is ideal. Always check local codes for specifics.
Can I modify my existing kitchen to improve accessibility?
Absolutely. Common modifications include lowering countertops, installing pull-out shelves, adding lever handles, and widening doorways. These upgrades can often be done incrementally, fitting most budgets.
Which appliances are best for accessibility?
Look for front-control ranges, side-opening ovens, touchless faucets, and adjustable-height counters. These features make cooking and cleaning safer and easier for everyone.
How much does it typically cost to create an accessible kitchen?
Costs range from a few thousand dollars for simple updates to over $15,000 for comprehensive remodels with smart tech. Planning carefully helps you prioritize features within your budget.
Do universal design features benefit all users?
Yes. Features like lower counters, good lighting, and open layouts improve usability for everyone, from children to seniors, and make your kitchen more welcoming overall.
Conclusion
A well-planned accessible kitchen isn’t just about meeting standards—it’s about reclaiming freedom and confidence in your daily routines. Think of your kitchen as a space that adapts to you, not the other way around.
Start with clear pathways, functional fixtures, and smart tech, then watch your space transform into a hub of independence and comfort. After all, a kitchen built for everyone is a kitchen built for life.
Halloween Picks
halloween
As an affiliate, we earn on qualifying purchases.