
TL;DR

Get everyday helpers delivered free — and shop member deals
- Fast, free delivery on millions of items
- Access to Prime Big Deal Days deals on October 6–7
- Prime Video, Amazon Music and more included
Making a bathroom sink accessible involves lowering the rim to 34 inches or less, creating knee clearance of at least 27 inches, and choosing user-friendly faucets. Small modifications like pipe insulation and faucet swaps can dramatically improve usability without full remodels.
Imagine trying to brush your teeth or wash your hands when the sink is just out of reach. For many, this simple task becomes a frustrating hurdle. The bathroom sink is often the biggest barrier in the bathroom, especially for wheelchair users or those with limited mobility.
By making a few smart adjustments, you can transform your sink into a truly accessible feature—one that supports independence and dignity. Whether you’re planning a full renovation or just a quick upgrade, understanding the essentials helps you get it right.
Keep the sink rim at or below 34 inches, with at least 27 inches of knee clearance underneath.
Choose wall-mounted or shallow vanities that leave open space for wheelchair access.
Opt for single-lever or sensor faucets for easy, one-handed operation.
Insulate hot water pipes to prevent burns and improve safety.
Many upgrades can be affordable and DIY-friendly—small changes make a big difference in independence.
How to Set the Right Height for Your Sink
The key to an accessible sink is its height. Standard vanities sit at 30-36 inches, but this often blocks seated users. The goal? Keep the rim at or below 34 inches from the floor. This allows someone in a wheelchair or with limited mobility to reach comfortably.
For a truly accessible setup, you’ll want at least 27 inches of knee clearance underneath. That means no cabinets or drawers blocking the space, and a clear 30 x 48-inch area in front of the sink. This clearance is essential because it provides enough room for a wheelchair to approach, align, and use the sink comfortably. Without sufficient knee space, users might have to awkwardly twist or lean, reducing safety and independence. For example, a homeowner replacing a standard vanity with a wall-mounted sink that hangs 32 inches high and leaves open space underneath ensures easier access and reduces strain during daily routines.
As an affiliate, we earn on qualifying purchases.
Choosing a Sink Style That Rolls Under Easily
Wall-mounted sinks are the gold standard for accessibility—they remove bulky cabinetry and allow a wheelchair to slide underneath seamlessly. This open design not only improves function but also adds a modern aesthetic. Floating vanities with shallow depths can also be accessible if they incorporate a flat, unobstructed surface that extends to the edge, making it easier to reach all parts of the sink without obstruction.
Pedestal sinks, while elegant, often lack sufficient counter space or knee clearance, which can limit usability for some users. Standard cabinet vanities may seem less accessible at first, but with modifications—like removing doors or cutting back cabinetry—they can be adapted. These changes create a more open profile, making the sink more usable and reducing the risk of bumping or strain. For instance, a homeowner removing cabinet doors and lowering the counter height can create a streamlined, accessible surface that accommodates various needs while maintaining style.
As an affiliate, we earn on qualifying purchases.
Making Faucets Easy to Use for Everyone
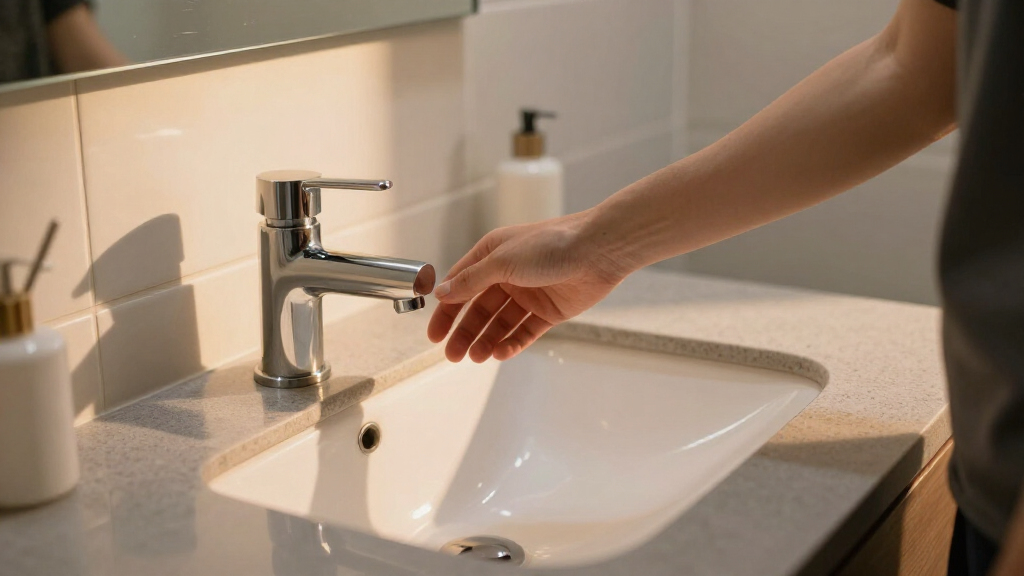
Faucets are often overlooked but are crucial for accessibility. The design of the faucet can either facilitate or hinder daily use, especially for people with limited grip strength, arthritis, or dexterity issues. Single-lever, touchless, or push-button controls are game-changers—they operate with minimal effort, require less force, and can be used with a closed fist or elbow, making them highly inclusive options.
Choosing the right faucet is about more than aesthetics; it’s about functionality. Replacing a traditional twist knob with a single-lever faucet, for example, simplifies operation and reduces fatigue. This is especially important for elderly users or those with conditions affecting hand strength, as the easier the faucet is to operate, the more likely they are to maintain independence in daily routines. The tradeoff often involves a slightly higher initial cost or installation effort, but the long-term benefits in usability are significant and well worth it.
As an affiliate, we earn on qualifying purchases.
How to Prevent Burns and Accidents Under the Sink
Safety under the sink is crucial. Hot water pipes can become a burn hazard if they aren’t insulated or enclosed, especially for children and seniors who might accidentally touch or lean against them. Proper insulation with foam pipe covers or purpose-made guards acts as a barrier, preventing burns and reducing the risk of injury during routine use.
Additionally, sharp edges or exposed pipes can cause scrapes or cuts, especially in tight spaces where accidental bumps are common. Wrapping insulation around pipes not only prevents burns but also creates a smoother surface that reduces the chance of injury. Caregivers should regularly check for exposed or sharp components and address them promptly. These safety measures might seem minor, but they significantly enhance safety, confidence, and peace of mind for all users.
As an affiliate, we earn on qualifying purchases.
Practical Tips for a Complete Accessible Sink Setup
- Lower the Rim: Keep the countertop at or below 34 inches. This height ensures that seated users can reach the sink comfortably without straining or leaning excessively, which can cause fatigue or imbalance over time.
- Create Knee Space: Remove cabinetry or modify existing structures to ensure at least 27 inches of clearance. This space is vital for proper wheelchair access, allowing users to get close enough and position themselves comfortably for grooming or handwashing.
- Choose the Right Faucet: Single-lever or sensor-based controls reduce the effort needed to operate the faucet, making it accessible to a wider range of users, including those with limited grip or strength.
- Insulate Pipes: Wrap hot water pipes with foam insulation to prevent burns, especially during prolonged use or accidental contact. This simple modification enhances safety without major renovation costs.
- Position Mirrors & Accessories: Mount mirrors and other accessories at a tilt or lower height, within reach of seated users. Proper placement increases usability and prevents awkward stretching or standing on tiptoes.
What It Really Takes to Make a Sink Accessible — Costs & Considerations
Basic upgrades like swapping a faucet or insulating pipes are relatively affordable and can often be completed in a few hours, costing a few hundred dollars. These modifications are practical first steps that significantly improve usability without major disruption. More involved projects, such as rerouting plumbing or installing a wall-mounted sink, require more planning, time, and financial investment—ranging from $1,500 to $5,000+. These larger upgrades often provide a more seamless and permanent solution, but they may also involve structural changes and professional assistance.
Understanding the costs helps in planning effectively. Additionally, exploring assistance programs—like Medicaid waivers, VA benefits, or local grants—can make these upgrades more accessible financially. For example, a family might invest around $3,000 in a wall-hung sink with sensor controls, greatly enhancing daily independence for an elderly family member. The key is balancing budget, needs, and future flexibility to choose the right approach.
Quick Fixes vs. Major Remodels: Which Fits You?
If you need a fast, cost-effective solution, simple upgrades like swapping the faucet, insulating pipes, and adjusting the sink height can be completed within a weekend. These modifications improve safety and function immediately, making them ideal for quick improvements. For a more permanent, integrated solution, consider a full remodel—replacing the vanity with a wall-mounted sink, modifying cabinetry, and rerouting plumbing—resulting in a sleek, fully accessible setup. The decision depends on your specific needs, budget, and whether you’re prepared for some disruption during installation.
For instance, a family might choose quick fixes now, such as installing a sensor faucet and lowering the counter, while planning a more comprehensive remodel in the future. This phased approach allows for immediate safety improvements while spreading out costs and effort over time. Ultimately, the choice involves weighing convenience against long-term functionality, always aiming for a setup that promotes independence and ease of use.
Frequently Asked Questions
How high should an accessible bathroom sink be?
An accessible sink should have its rim at or below 34 inches from the floor, with at least 27 inches of knee clearance underneath to allow wheelchair users to approach comfortably.
Can I modify my existing vanity to make it accessible?
Yes, sometimes. Removing doors, cutting back cabinetry, lowering the counter, insulating pipes, and replacing the faucet can make an existing vanity more accessible without a full remodel. However, plumbing rerouting may require professional help.
What’s the best faucet for limited grip strength?
Single-lever and sensor-activated faucets are easiest to operate, requiring minimal force and no twisting — ideal for arthritic or limited grip users.
How much does an accessible sink upgrade cost?
Simple changes like faucet swaps and pipe insulation can cost a few hundred dollars, while full remodels with plumbing rerouting often range from $1,500 to $5,000+. Assistance programs may help offset these costs.
Is making my sink accessible worth the effort?
Absolutely. It improves safety, independence, and the overall look of your bathroom. Universal design features are increasingly seen as a valuable upgrade, not a sign of medical need.
Conclusion
Making your bathroom sink accessible isn’t just about compliance — it’s about enabling real independence. A few thoughtful tweaks can turn a frustrating obstacle into a functional, stylish feature that everyone can use.
Picture a morning routine where everyone—from kids to caregivers—feels confident and safe at the sink. That’s the power of smart, practical design. Start with one step today, and watch your bathroom become more inclusive tomorrow.
Fall Picks
fall essentials
As an affiliate, we earn on qualifying purchases.