This guide provides clear instructions for educators, caregivers, or students on choosing and using hearing amplifiers. You will learn how to select an appropriate device, properly fit it, and ensure it functions correctly to support better hearing in classroom settings. This process is suitable for those with basic familiarity with hearing devices and takes about 30 to 60 minutes.

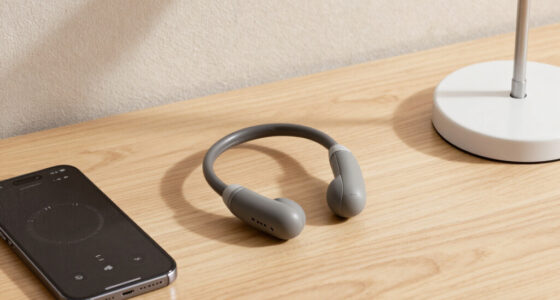
Hearing Amplifier for Seniors with Rechargeable Battery and Microphone
- ✔ Auto-Gain Control: Yes
- ✔ Microphone: Directional Noise-Canceling Microphone
- ✔ Battery: Rechargeable, up to 120 hours
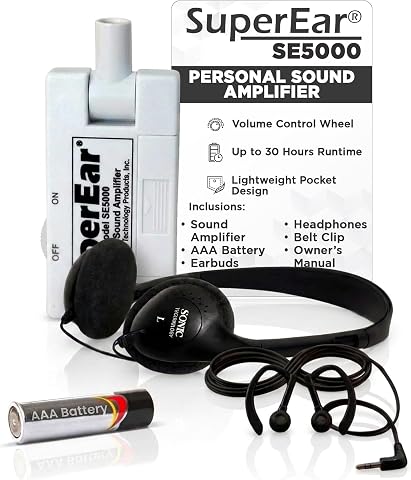
SuperEar Model SE5000 (PSAP) for Seniors – Hearing Amplifier
- ✔ Decibel Gain: 107 dB
- ✔ Ambient Sound Increase: 50 dB
- ✔ Battery Life: 30 hours

Reizen Loud Ear 110dB Gain Personal Amplifier
- ✔ Gain: 110 dB
- ✔ Sensitivity: 120 dB
- ✔ Microphone: Built-in
Difficulty: Intermediate | Time: 30-60 minutes
What You’ll Need
Tools & Materials:
- Hearing amplifier device
- Cleaning cloth
- Batteries or power source
- Optional: hearing test results
Knowledge:
- Basic understanding of hearing aids or amplifiers
- Familiarity with the student’s hearing needs
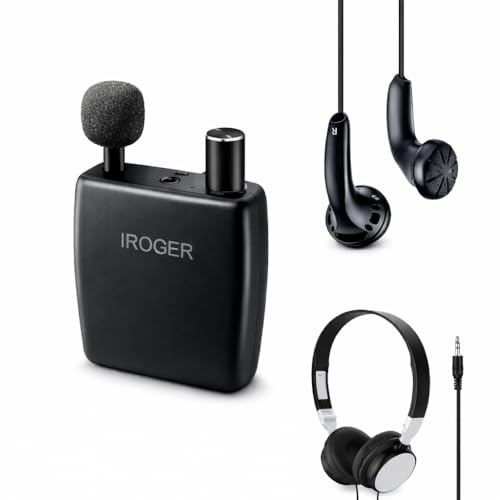
IROGER Hearing Amplifier for Seniors, Personal Sound Amplifier, Smart Auto-Gain, Directional Microphone, Rechargeable Battery, Headphones & Earbuds Included
Smart Auto-Gain Control – Enjoy crystal-clear sound at all times. iRoger automatically balances audio levels to enhance voices...
As an affiliate, we earn on qualifying purchases.
Hearing Amplifier for Seniors with Rechargeable Battery and Microphone
This hearing amplifier stands out for its auto-gain control, providing clear sound without complicated adjustments. Its long-lasting rechargeable battery offers up to 120 hours of use, making it ideal for students who need all-day support without frequent charging. The device’s lightweight, discreet design ensures minimal distraction in class, and the simple one-dial operation makes it accessible for users of all ages. However, it may not satisfy students with severe hearing loss or those seeking detailed sound customization. Compared with the SuperEar, it lacks the advanced amplification power but wins on battery life and ease of use.
Pros:
- Clear sound with auto-gain control
- Up to 120 hours of battery life
- Simple operation with a single volume dial
- Includes comfortable headphones and earbuds
Cons:
- Limited to basic volume adjustments
- Not suitable for severe hearing loss
- No advanced sound customization
Best for: Students needing a straightforward, reliable amplifier with long battery life
Not ideal for: Students with severe hearing impairment or those requiring extensive sound customization
Bottom line: This pick offers an excellent balance of ease of use and battery life, making it ideal for most student needs without overwhelming features.
“This pick offers an excellent balance of ease of use and battery life, making it ideal for most student needs without overwhelming features.”

SuperEar Model SE5000 (PSAP) for Seniors - Hearing Amplifiers for Seniors, Super Ear Personal Sound Amplifier, Sound Amplifier Listening Device and Audio Accessories in 50dB Ambient Sounds Increase
COMPATIBILITY: Response to sound amplification is completely dependent on an individual's unique ability to detect sounds. For this...
As an affiliate, we earn on qualifying purchases.
SuperEar Model SE5000 (PSAP) for Seniors – Hearing Amplifier
The SuperEar SE5000 is designed with up to 50dB of ambient sound increase, making it suitable for students who need noticeable amplification. Its compact, portable design with included headphones, earbuds, and a belt clip makes it easy to carry and use in different environments. The device’s tactile volume control enhances usability for students who prefer physical buttons over digital controls. Still, its effectiveness depends heavily on individual hearing needs, and it doesn’t connect wirelessly to televisions or other devices. Compared to the Reizen, it offers more portability but less raw power.
Pros:
- Easy to operate with tactile controls
- Portable and lightweight
- Long battery life of up to 30 hours
- Effective ambient sound amplification
Cons:
- Limited amplification for severe hearing loss
- No wireless connectivity
- Effectiveness varies depending on individual needs
Best for: Students who value portability and adjustable volume control
Not ideal for: Students requiring high amplification or seamless device integration
Bottom line: The SE5000 makes sense for students who prioritize portability and tactile controls, but may not meet the needs of those with significant hearing impairments.
“The SE5000 makes sense for students who prioritize portability and tactile controls, but may not meet the needs of those with significant hearing impairments.”

Reizen Loud Ear 110dB Gain Personal Amplifier
Powerful hearing enhancement amplifier with 120dB sensitivity helps you hear
As an affiliate, we earn on qualifying purchases.
Reizen Loud Ear 110dB Gain Personal Amplifier
The Reizen Loud Ear offers up to 110dB gain and high sensitivity, making it suitable for students with profound hearing difficulties. Its built-in microphone and adjustable volume allow personalized hearing aid-like experience, and the dual earphones ensure a more natural sound. The device can pick up sounds from up to 100 feet away, providing excellent situational awareness. However, it’s primarily a personal amplifier, not a professional device, and relies on AAA batteries, which may require frequent replacements. Compared with the others, it’s more powerful but less sleek and less versatile in everyday environments.
Pros:
- High power with 110dB gain
- Effective at picking up sounds from 100 feet away
- Includes batteries and dual earphones
- Adjustable volume for personalized hearing
Cons:
- Limited to personal amplification
- Requires batteries that need replacement
- Bulkier and less discreet
Best for: Students with significant hearing challenges needing maximum amplification
Not ideal for: Students seeking a discreet or multi-functional device
Bottom line: This device excels in power and range, making it suitable for students with severe hearing needs but less ideal for everyday classroom use where discretion is preferred.
“This device excels in power and range, making it suitable for students with severe hearing needs but less ideal for everyday classroom use where discretion is preferred.”
As an Amazon Associate we earn from qualifying purchases.
Before You Start
Verify the hearing amplifier’s model and ensure it is fully charged or has fresh batteries. Confirm the device is appropriate for the student’s hearing level. Read the manufacturer’s instructions if available. Make sure the environment is quiet enough for fitting and testing the device.
Step-by-Step Instructions
Step 1: Select the appropriate hearing amplifier
Review the student’s hearing assessment or consult with an audiologist to choose an amplifier with suitable volume and frequency settings. Confirm the device size and style fit the student’s ear or hearing needs.Tip: Choose a device with adjustable volume and tone controls for personalized fit.
Check: The selected device matches the student’s hearing profile and is comfortable to hold or wear.
Step 2: Insert batteries and power on the device
Insert fresh batteries or connect the device to its power source. Turn the amplifier on and listen for a clear, consistent sound indicating proper power and functionality.Tip: Check the battery compartment for proper placement to avoid power issues.
Check: The device powers up without hesitation, and you hear a clear, steady sound.
Step 3: Position the amplifier correctly
Place the amplifier near or inside the student’s ear, following the manufacturer’s instructions. For behind-the-ear models, position the device behind the ear and insert the earpiece securely. For in-the-ear models, gently insert the earpiece into the ear canal, ensuring a snug fit.Tip: Use the provided fittings or cushions to improve comfort and sound quality.
Check: The device remains securely in place and produces clear sound without discomfort.
Step 4: Adjust volume and settings
Use the device’s controls to set the volume to a comfortable level for the student, avoiding excessive loudness. If available, fine-tune tone or frequency settings for clarity and comfort.Tip: Start with a low volume and increase gradually while monitoring the student’s response.
Check: The student hears sounds clearly without discomfort, and speech is intelligible.
Step 5: Test the hearing amplifier in the classroom environment
Have the student listen to a familiar voice or sound at a normal classroom distance. Observe if the student reports improved hearing and if the device functions without feedback or noise.Tip: Ask the student for feedback on comfort and sound quality.
Check: The student demonstrates improved sound perception and no technical issues occur.
Step 6: Clean and store the device properly
Turn off the amplifier, remove it from the ear if necessary, and clean the ear and device surfaces with a soft cloth. Store the device in a dry, safe place when not in use.Tip: Use manufacturer-approved cleaning materials to avoid damage.
Check: The device remains in good condition and functions properly during subsequent uses.
Common Mistakes to Avoid
- Using a device that is not properly fitted, causing discomfort or poor sound quality. — Adjust the fit carefully and choose the correct size and style for the student’s ear shape and hearing needs.
- Setting the volume too high, risking discomfort or further hearing damage. — Start at a low volume and increase gradually, monitoring the student’s comfort and response.
- Not replacing or checking batteries regularly, leading to device failure. — Set reminders to check batteries weekly or before each use, and carry spare batteries.
- Failing to clean the device regularly, resulting in reduced sound quality or hygiene issues. — Clean the device according to the manufacturer’s instructions after each use.
Troubleshooting
Problem: Device produces no sound or intermittent sound.
Solution: Check and replace batteries if necessary. Ensure the device is properly turned on and fitted. Test with a different battery or device if available.
Problem: Feedback or whistling noise.
Solution: Re-insert or adjust the device for a better fit. Reduce volume and reposition the earpiece. Clean the device and earpiece to remove any debris.
Problem: The sound is distorted or muffled.
Solution: Check for blockages in the earpiece or microphone. Clean the device carefully and verify the settings are correct.
What Success Looks Like
The student hears sounds clearly and comfortably, with no feedback or distortion. The device remains securely in place during use, and the student reports improved hearing in the classroom. The amplifier functions reliably over multiple uses.
Next Steps
Monitor the student’s response regularly and adjust device settings as needed. Schedule periodic checks with an audiologist if possible. Teach the student or caregiver how to operate and care for the amplifier. Replace or upgrade the device if it no longer meets the student’s needs.
Frequently Asked Questions
How do I know if the hearing amplifier is suitable for my student?
Consult with an audiologist or review the student’s hearing assessment to select a device with appropriate frequency and volume settings. Choose a style that fits comfortably and securely.
What should I do if the device causes discomfort?
Adjust the fit or size of the earpiece. Use different cushions or fittings if available. If discomfort persists, consult an audiologist for alternative options.
How often should I clean the hearing amplifier?
Clean the device after each use with a soft, dry cloth. Follow the manufacturer’s cleaning instructions to prevent damage and hygiene issues. Schedule professional cleaning periodically if recommended.
Can I use any batteries for the amplifier?
Use only the batteries recommended by the manufacturer to ensure proper operation and prevent damage. Keep spare batteries in a safe, dry place.