
TL;DR
Making your home wheelchair accessible involves small but impactful changes in every room. From wider doorways to lowered counters, these adjustments boost safety, independence, and comfort.
Imagine walking into your home feeling confident, knowing each step is safe and accessible. It’s not just about convenience—it’s about reclaiming independence and dignity.
In this guide, you’ll learn practical, room-by-room tips to transform your space. Whether you’re remodeling or making temporary adjustments, these ideas can help you craft a home that welcomes everyone with open arms.
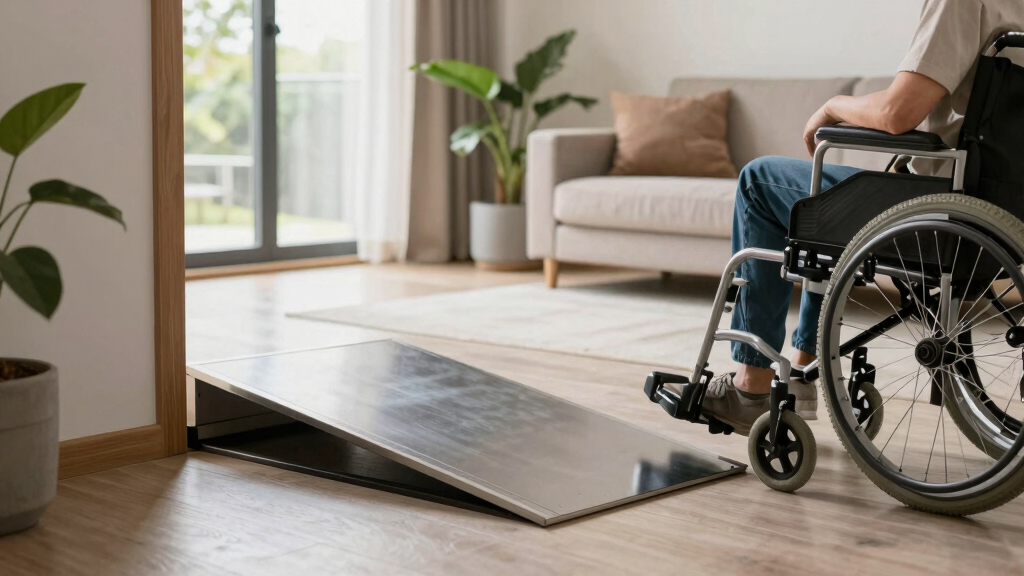
Start with the entryway: widen doors, add ramps, and smooth thresholds for easy access.
Create open, wide hallways—at least 36 inches—to prevent bottlenecks and jams.
Design each room with maneuverability in mind—think turning radius, reachable storage, and low-profile furniture.
In the kitchen and bathroom, prioritize lowering surfaces, installing grab bars, and removing thresholds.
Use smart home tech and good lighting as simple, powerful tools to boost independence throughout your home.
Start at the Front Door: Widen, Simplify, and Smooth Out Entryways
The first impression of accessibility begins at your front door. Widen doorways to at least 32 inches to give a wheelchair enough room to pass comfortably. This prevents bottlenecks and ensures smooth transitions between spaces, which is crucial for safety and independence. When doorways are too narrow, users may struggle to maneuver through, increasing frustration and risk of injury. Replacing knobs with lever-style handles is also essential; levers are easier to operate, especially for individuals with limited hand strength or dexterity, reducing the effort required and minimizing the chance of strain or accidental injury during opening and closing.
Imagine a neighbor rolling up with a bright red wheelchair. A threshold that’s low or beveled makes crossing seamless—not a trip hazard or a bump that jars your wheels. High thresholds or abrupt steps can cause wheelchair wheels to get stuck or tip, which can lead to falls or damage to the mobility device. Clear, level pathways mean no surprises or obstacles when entering, which can be the difference between feeling confident or anxious about mobility.
Here’s what you can do:
- Widen door openings
- Install lever handles
- Reduce thresholds or add beveled ramps
wheelchair accessible door handles
As an affiliate, we earn on qualifying purchases.
As an affiliate, we earn on qualifying purchases.
Make Hallways and Corridors a Breeze to Navigate
Hallways are the arteries of your home—if they’re too narrow, they become obstacles to independence. Maintaining a minimum width of 36 inches allows a wheelchair to pass comfortably and turn easily, which is essential for navigating multiple rooms or tight spaces. Narrow hallways force users into awkward maneuvers, such as backing out or squeezing through, which can cause fatigue or loss of control, increasing the risk of accidents. Wider hallways not only facilitate safe movement but also reduce cognitive load—less concentration is needed to navigate, making daily routines less stressful.
Remove clutter—furniture, rugs, cords—that can cause trips or jams. Think of a cluttered hallway as a maze that can lead to frustration or injury. Clear, open paths improve safety and confidence, enabling users to move freely and quickly in case of emergencies. Well-maintained, clutter-free hallways also help visually impaired individuals by providing consistent contrast and unobstructed sightlines, reducing disorientation.
Small changes make a big impact:
- Remove unnecessary furniture
- Keep pathways at least 36 inches wide
- Use bright lighting and contrast colors to define edges
Consistently maintaining these clear pathways reduces the cognitive and physical effort needed to navigate your home, fostering independence and reducing the risk of falls or collisions. It also minimizes the mental fatigue associated with navigating a cluttered or narrow space, which is crucial for maintaining safety over time.
wheelchair ramps for home entry
As an affiliate, we earn on qualifying purchases.
As an affiliate, we earn on qualifying purchases.
Transform Your Living Room Into a Wheelchair-Friendly Lounge
Your living room should be a haven of comfort and maneuverability. Arrange furniture to allow a 5-foot diameter turning radius—think of this as the space needed to spin around comfortably without hitting obstacles. This space is vital for everyday tasks like changing direction, reaching for objects, or assisting others. Without sufficient space, users may have to perform awkward maneuvers that strain their body or compromise safety, such as twisting or backing into tight corners, which can lead to fatigue or accidents.
Choose low-profile sofas with removable arms to facilitate transfers, which can significantly reduce strain and risk of injury. Removable arms make it easier to slide onto the seat from a wheelchair or transfer aid, promoting independence and safety. The arrangement should prioritize open pathways and accessible seating options to minimize the effort needed to move around. This not only makes the space more functional but also encourages longer, more comfortable use, supporting social interactions and relaxation without discomfort or fatigue.
Practical tips:
- Place chairs and sofas with ample space between
- Use furniture with low, wide seats
- Keep pathways free from clutter
Creating a spacious, accessible living area enhances social interaction and relaxation, making your home a true sanctuary for everyone. When the layout considers ease of movement, it reduces physical barriers and mental stress, fostering a welcoming environment for all users.
lowered kitchen countertops for wheelchair
As an affiliate, we earn on qualifying purchases.
As an affiliate, we earn on qualifying purchases.
Kitchen Hacks: Make Cooking Accessible and Safe
The kitchen is often the trickiest room—high counters, deep cabinets, and tight spaces can pose significant barriers. Lower countertops and sinks to 30-34 inches to enable comfortable reaching and work from a seated position. This change reduces strain and fatigue, allowing users to cook and clean with greater autonomy. When surfaces are at standard heights, reaching for ingredients or operating appliances can be difficult, especially for those with limited reach or strength, leading to frustration or even injury.
Install pull-out shelves, side-opening ovens, and accessible appliances—these innovations turn your kitchen into a user-friendly space. Pull-out shelves allow for easier access to items stored deep within cabinets, reducing the need for awkward stretching or bending. Side-opening ovens eliminate the need to reach over hot surfaces or into tight spaces, decreasing burn risks. These modifications also promote better organization, which reduces clutter and makes items easier to find and reach, streamlining workflow and reducing the risk of accidents caused by hurried or awkward movements.
Here’s a quick comparison of features:
| Feature | Standard | Accessible |
|---|---|---|
| Counter Height | 36-38 inches | 30-34 inches |
| Oven Type | Top-opening | Side-opening or drawer-style |
| Cabinets | Above waist level | Lower or pull-out shelves |
Clear space underneath sinks and cooktops is essential—this allows a wheelchair to slide underneath for cooking or cleaning, which promotes independence. Proper clearance not only enables accessibility but also prevents awkward postures that could cause strain or injury. Safety features like non-slip surfaces and adequate lighting further reduce accidents, especially in a space prone to spills and splashes that can cause slips.
Remember: prioritizing safety and ease of access in your kitchen creates a more enjoyable, empowering environment. Thoughtful modifications reduce hazards and make daily routines smoother, encouraging independence and confidence in cooking activities.
grab bars for bathroom
As an affiliate, we earn on qualifying purchases.
As an affiliate, we earn on qualifying purchases.
Bathroom Makeover: Turn It Into a Safe Retreat
Bathrooms are often the most hazardous room without proper modifications. Installing grab bars near the toilet and in the shower creates a safety net—like handrails on a staircase—reducing the risk of slips and falls during transfers or bathing. Proper placement of grab bars is critical; they should be positioned at accessible heights and locations where users naturally need support, such as beside the toilet or along the shower wall, to ensure maximum stability and safety during transfers.
A roll-in shower with no threshold turns bathing into a smooth, safe experience. This design eliminates tripping hazards and makes entering and exiting straightforward, which is especially beneficial for those with limited mobility or balance issues. Incorporate a textured, non-slip floor in the shower and bathroom to provide secure footing, even when wet—this simple addition can dramatically decrease fall risks. Non-slip mats or textured tiles help prevent slips in both the shower and bathroom floor, especially when water is present, which is a common cause of falls in this room.
Accessible sinks with open space underneath facilitate transfers and reduce strain. Visualize sitting close enough to wash your face comfortably or use the sink without awkward contortions. Choosing fixtures with lever handles and easy-to-reach controls further enhances usability. These features are essential because they allow users to perform daily hygiene tasks independently, reducing reliance on assistance and increasing confidence in using the space.
Quick tips:
- Install grab bars at appropriate heights and locations
- Use roll-in showers with textured, non-slip floors
- Opt for non-slip flooring and mats
- Choose accessible sinks with open space underneath
These modifications not only improve safety but also promote independence, making daily routines less stressful and more secure. Thoughtful placement and choice of fixtures can significantly reduce fall risks and enhance overall usability of the bathroom.
Bedrooms: Create a Cozy, Accessible Sleep Space
Bedrooms should feel like a sanctuary—yet still be functional for wheelchair users. Ensure enough space around the bed for easy maneuvering, ideally 3 feet on each side. This allows for comfortable transfers and reduces the risk of bumping into furniture or walls, which can cause injuries or discomfort. Adequate space also facilitates the use of assistive devices or aids during dressing or transferring, promoting independence.
Accessible closet systems with reachable rods and shelves make getting dressed simpler. Imagine opening a closet door and finding everything within arm’s reach, eliminating the need for stretching or climbing. Incorporate adjustable or pull-down rods to accommodate different heights and preferences, enhancing independence in dressing routines. These features help prevent strain and make daily routines more manageable, especially for those with limited mobility or strength.
Simple adjustments include:
- Clear space around the bed for easy access
- Lowered closet rods and shelves for reachability
- Accessible storage options that are easy to open and see
Designing the bedroom with accessibility in mind ensures a restful, functional space that promotes autonomy and comfort. When the environment is thoughtfully arranged, it reduces stress and makes mornings smoother, fostering a peaceful sleep environment and easier daily routines.
General Tips: Ramps, Tech, and Lighting Make a Bigger Difference
Beyond individual rooms, think holistically. Ramps instead of stairs open up multiple levels—imagine a gentle incline leading to your front porch or deck, providing seamless access without the hazards of stairs. Properly designed ramps should have a gentle slope, typically no more than 1 inch of rise per foot, to ensure safety and ease of use. This tradeoff involves space considerations—longer ramps provide safer, more manageable inclines but require more room. Balancing space and safety is key; a steeper ramp might save space but could be difficult or unsafe to navigate, especially for those with limited strength or balance.
Smart home devices—voice-controlled lights, automatic doors—turn everyday tasks into effortless actions. These technologies reduce physical effort and help maintain independence, especially in larger or multi-level homes. Visualize sitting in your chair and controlling everything with just your voice, making daily routines smoother and less tiring. However, reliance on technology also means considering backup options and ensuring controls are accessible and user-friendly for everyone in your household.
Good lighting and contrasting colors help with visibility—picture a well-lit hallway with bright, clear edges guiding your way, reducing confusion and fall risk. Proper illumination is essential for safety, especially in areas prone to shadows or low light. Thoughtful lighting design can also improve mood and alertness, contributing to overall well-being in your accessible home.
Quick checklist:
- Install ramps where needed, considering space and slope
- Use smart technology for ease of control, ensuring accessibility
- Enhance lighting and contrast for safety and visibility
Adopting a holistic approach ensures that every aspect of your home supports independence, safety, and comfort—making your space truly accessible and welcoming. Considering these factors together helps create a balanced environment that minimizes hazards and maximizes usability for all users.
Frequently Asked Questions
Where should I start if I want to make my home more accessible?
Begin with a thorough assessment of your needs and prioritize entryways, hallways, and the most-used rooms. Consulting with an accessibility professional can help you develop a practical plan.What are the most affordable modifications I can make?
Simple changes like installing lever handles, removing thresholds, and rearranging furniture cost little but greatly improve usability. Many hardware stores offer affordable, easy-to-install options.Can I make modifications in a rental home?
Yes, many modifications like portable ramps, removable grab bars, and rearranged furniture can be temporary. Always check with your landlord and choose options that are non-permanent.What are the best products for improving wheelchair access?
Adjustable-height countertops, roll-in showers, and automatic door openers are highly effective. Look for products that are easy to operate and fit your space.Are there financial assistance options available?
Many regions offer grants, tax credits, or non-profit programs that help cover home modification costs. Check with local agencies or advocacy groups for support.Conclusion
Every small change adds up to a home that truly welcomes and supports independence. Focus on practical, room-by-room adjustments—your space should adapt to you, not the other way around.
Imagine walking into your home with confidence, knowing that every step, turn, and task is safe and effortless. That’s the power of thoughtful accessibility—turning your house into a true sanctuary of ease and dignity.